
How to Screen Record with Audio on Mac
Before diving into the technical details, let’s understand why screen recording on your Mac is such a valuable skill. Screen recording allows you to capture visual and audio content from your Mac’s screen, making it incredibly versatile for a range of purposes.
Common Use Cases
- Creating Tutorials: Screen recording is perfect for making educational videos, whether teaching a software tutorial, sharing cooking tips, or explaining complex concepts.
- Business Presentations: Professionals can use screen recording to prepare engaging presentations with audio commentary and visual aids.
- Gaming and Entertainment: Gamers often record their gameplay to share with friends or create content for online platforms. Additionally, screen recording captures memorable moments from TV shows or movies.
- Troubleshooting: Screen recording is invaluable for technical support, allowing users to demonstrate issues they face on their Mac.
Choosing the Right Software
Now that you understand the importance of screen recording let’s explore the software options available for Mac users. Also, read about Deep Dive into Fine Tune llM for Chatbot
Built-in Options: QuickTime Player
QuickTime Player is a free, pre-installed application on Mac that offers basic screen recording capabilities. It’s a good starting point for beginners.
Third-Party Alternatives: OBS Studio, ScreenFlow
Consider third-party software like OBS Studio or ScreenFlow for more advanced features and customization options. These tools provide greater flexibility and control over your screen recording experience.
In the next section, we’ll delve into how to prepare your Mac for screen recording.
Preparing Your Mac for Screen Recording
Before you begin recording your screen, it’s essential to ensure that your Mac meets the requirements and adjust settings for optimal performance.
System Requirements
To record your screen smoothly, your Mac should ideally have the following specifications:
- A recent macOS version (macOS Catalina or later)
- Sufficient RAM (8GB or more is recommended)
- Adequate storage space for saving recordings
Adjusting Settings for Optimal Performance
Before you start recording, check and adjust the following settings on your Mac:
- Display Resolution: Set your screen resolution to the desired level. Higher resolutions offer better video quality but may require more processing power.
- Audio Input: Ensure your microphone is connected correctly and selected as the audio input source.
With your Mac prepared, let’s move on to the screen recording process.
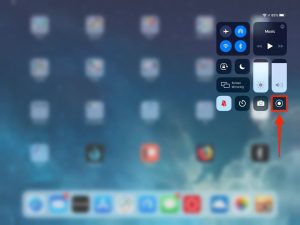
Recording Your Mac Screen
Launching QuickTime Player
If you’re using QuickTime Player for screen recording, follow these steps:
- Open QuickTime Player from your Applications folder.
- Click on “File” in the menu bar.
- Select “New Movie Recording.”
- Click the arrow next to the record button and choose your desired settings for video and audio. For interesting information visit our website techaicare.com
Setting Up Your Recording Parameters
Before you hit the record button, adjust the following parameters:
- Camera Source: Choose your Mac’s built-in camera or an external camera to include a webcam overlay.
- Microphone Source: Select the microphone you want to use for audio recording.
- Quality Settings: Adjust video and audio quality settings based on your preferences and available resources.
Starting the Recording Process
Once configured your settings, click the record button to capture your screen. Be sure to narrate or provide context if your recording requires audio commentary.
In the next section, we’ll discuss how to record audio alongside your screen.
Recording Audio with Your Screen
To ensure your screen recording includes high-quality audio, follow these steps:
Selecting the Audio Source
When you start your screen recording, select the correct audio source. This is crucial for capturing clear audio.
Adjusting Audio Settings
Before you begin recording, check the audio settings to ensure optimal quality. Adjust the microphone input level to avoid distortion or background noise.
Ensuring Clear and Synchronized Audio
Watch your audio levels as you record to ensure they remain consistent and synchronized with your screen actions. Clear and well-timed audio enhances the quality of your recording.

Editing Your Screen Recording
After you’ve completed your screen recording, you can edit it to remove any unnecessary sections or enhance its quality.
Trimming and Cutting Unnecessary Parts
Use video editing software to trim or cut your recording sections that are irrelevant to your content. This helps keep your audience engaged.
Adding Annotations and Highlights
If your screen recording requires additional explanations, consider adding annotations, text overlays, or highlights to emphasize key points.
Enhancing Video and Audio Quality
Adjust video and audio settings during the editing process to enhance the overall quality of your recording. This includes adjusting brightness, contrast, and audio clarity.
Saving and Exporting Your Screen Recording
Once you’re satisfied with your edited screen recording, it’s time to save and export it.
Choosing the Right Format
Select the appropriate file format for your recording, depending on where and how you plan to share it. Standard formats include MP4 and MOV.
Saving to Your Preferred Location
Specify the location on your Mac where you want to save the recording. Be sure to choose a location that’s easy to access when you need the file.
Advanced Tips for Screen Recording on Mac
For those looking to become screen recording experts, here are some advanced tips:
Keyboard Shortcuts for Efficient Recording
Learn keyboard shortcuts to start, stop, and pause recordings more efficiently. These shortcuts can save you time and streamline your workflow.
Using Hotkeys to Control Your Recording
Consider setting up hotkeys that control various recording functions without leaving the screen you’re capturing. This can help you maintain a seamless recording experience.
Troubleshooting Common Issues
Screen recording may occasionally encounter problems. Here are some common issues and how to resolve them:
Dealing with Audio Sync Problems
If your audio becomes out of sync with your screen recording, adjust the settings in your recording software to correct the timing.
Resolving Recording Glitches
Should you encounter recording glitches or visual artifacts, try updating your recording software or adjusting your Mac’s settings to resolve the issue.
Alternatives to Built-in Mac Solutions
While QuickTime Player is handy, consider exploring third-party software options like OBS Studio and ScreenFlow for additional features and customization options.
Best Practices for Screen Recording on Mac
To ensure the best results in your screen recording endeavors, follow these best practices:
Maintaining Video and Audio Quality
Always prioritize video and audio quality. Clear visuals and audio make your content more engaging and effective.
Organizing Your Recorded Files
Develop a systematic approach to organizing your recorded files. Create folders and use transparent file naming conventions to stay organized.
Uses of Screen Recording Beyond Tutorials
Screen recording has diverse applications:
- Professional Applications: In the workplace, screen recording is used for training, software demos, and presentations.
- Personal Creativity: Creatives use screen recording for artistic projects, such as creating animations or capturing unique digital experiences.
Conclusion
Congratulations! You’ve now learned how to screen record with audio on your Mac like a pro. Whether using QuickTime Player or exploring third-party software, you have the tools and knowledge to create high-quality screen recordings. Remember to practice, experiment, and stay up-to-date with the latest recording techniques to unlock your full potential in this digital age.
FAQs
Can I record both the screen and webcam simultaneously on my Mac?
You can register your screen and webcam using third-party software like OBS Studio or ScreenFlow.
What’s the ideal duration for a screen recording?
The perfect time depends on your content. However, keep your recordings concise and focused to maintain viewer engagement.
Can I edit my screen recording on my Mac without third-party software?
You can use iMovie, a free video editing software for Mac, to edit your screen recordings.
How can I reduce the file size of my screen recordings?
You can lower the video resolution, use compression settings, or convert the recording to a more space-efficient format to reduce file size.
Is it legal to record online meetings or webinars on my Mac?
Recording online meetings or webinars may be subject to legal regulations and terms of service agreements. Always seek permission when necessary and respect privacy laws.